Bathroom Tiling - Ideas, Costs, and DIY Tips for Bathroom Renovation
A bathroom renovation is one of your most important home improvements. Among all design decisions, tiling a bathroom can be both a necessity for functionality and a bold statement of style. The right tiling ideas for a bathroom can help make a smaller bathroom appear larger. Tiles can add luxury to the room through their texture and colour, and provide durability in a room that is prone to moisture.
This Cut2Size bathroom tiling guide will walk you through the entire process, from choosing where to tile your bathroom to exploring modern bathroom tiling ideas. You'll also learn how much tiling in a bathroom costs in major Canadian cities. For those willing to tackle the project themselves, we offer practical DIY bathroom tiling advice.
Most common areas in a bathroom to tile
Tiles have become a very popular feature in modern houses. You can tile the walls or floors of your bathroom, or even both. It is available in a wide range of designs, it's easy to maintain, and it creates a calm, cool environment.
In deciding on the tile to use in a bathroom renovation, homeowners should consider not only the type but also its placement. Tile projects can range from a small bathroom backsplash up to tiling an entire bathroom job. The choices are varied, and each has its own design and functionality implications.
Floor tiling bathroom
The first step of any bathroom renovation is usually to tile the floor. Unlike walls, floors are constantly subjected to moisture and foot traffic, so they require slip-resistant and durable materials.
-
Ceramic tiling a bathroom floor is the most popular option because it offers a good balance between affordability and water resistance. It is available in many finishes, including matte and textured, so it can be used for both simple bathroom tile ideas and bolder designs.
-
Porcelain tiles offer a smooth, modern finish and superior durability. Porcelain is highly resistant to scratches, chips, heavy wear and other damage, which makes it the perfect material for tiling around toilets, vanities, or any other high-traffic area in a bathroom. Its sleek design is ideal for modern bathrooms. And while it may be slightly more pricey, its long-lasting nature often makes up for the cost.
-
Natural stone tiling, like marble, slate and travertine, can create a spa atmosphere in your bathroom. They require regular maintenance and sealing, but the unique veining and textures of these tiles elevate them to a whole new level.
Tip: For tiling a small bathroom floor, opt for larger tiles. Contrary to popular belief, tiling with large tiles in a small bathroom can actually increase the space by reducing grout lines.
Wall tiling ideas
Tiling bathroom walls will change the way you see space. The options range from tiling only bathroom backsplash behind a vanity to half-wall tiling, and up to tiling all bathroom walls for a seamless and immersive experience.
Tiling half wall in bathroom
This is an excellent choice for homeowners seeking durability in splash areas without overwhelming their rooms. Half-tiling bathroom works if a backsplash in your bathroom is just not enough or doesn't fit with your design.
The most common are grey or white bathroom tiling ideas. No wonder, as these are colours of cleanness and they pair beautifully with any wall paint, different vanity styles or linen cabinets and other design elements.
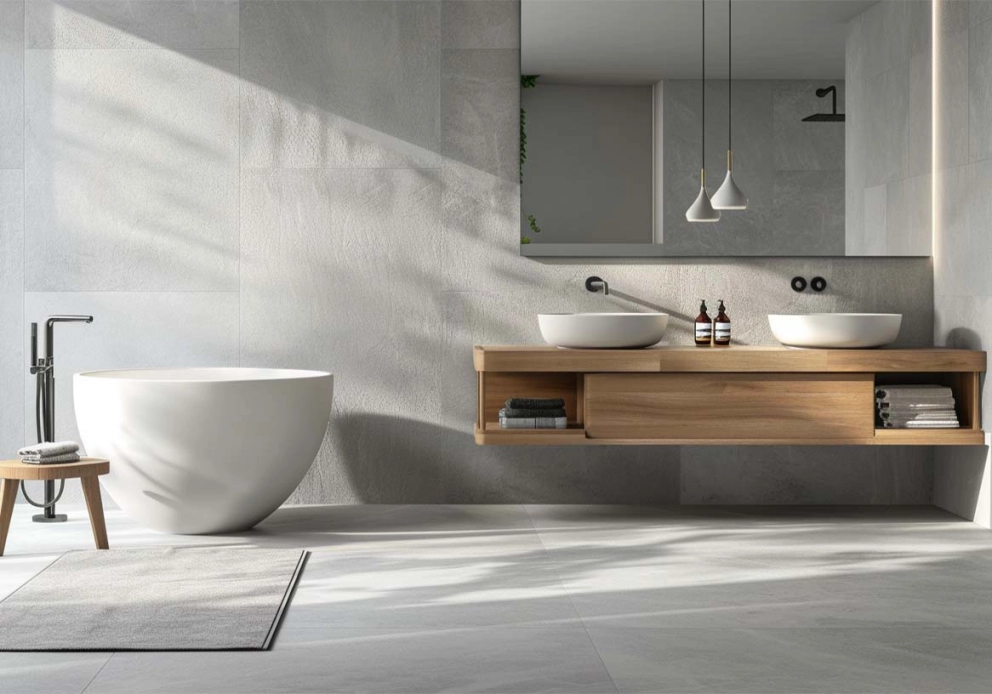
Tiling all bathroom walls
Tiling the whole bathroom creates a spa-inspired, hotel-like atmosphere. This style suits modern or minimalist interiors where material and texture are predominant. Subway tiling or colourful mosaic tile incorporation can be used to create dynamic surfaces in a bathroom for those who don't like the unifying, sterile look.
Tiling a single wall in the bathroom
Accent walls provide visual drama without full-room commitment. You can choose to tile a bathroom shower wall or highlight a bathroom shower window to make these focal points stand out.
Pros and cons of tiling bathroom walls |
|
|---|---|
|
Pros |
Cons |
|
Resistant to moisture and durable |
Costs are higher compared to paint |
|
Hygienic and easy to clean |
Time-consuming installation |
|
Endless design possibilities (patterns, textures, colours) |
If poorly designed, it can feel cold or clinical |
|
Protect walls from water and mould damage |
Grout lines require maintenance and sealing |
|
Increases the value of your property and its resale appeal |
Fixing DIY mistakes can be costly |
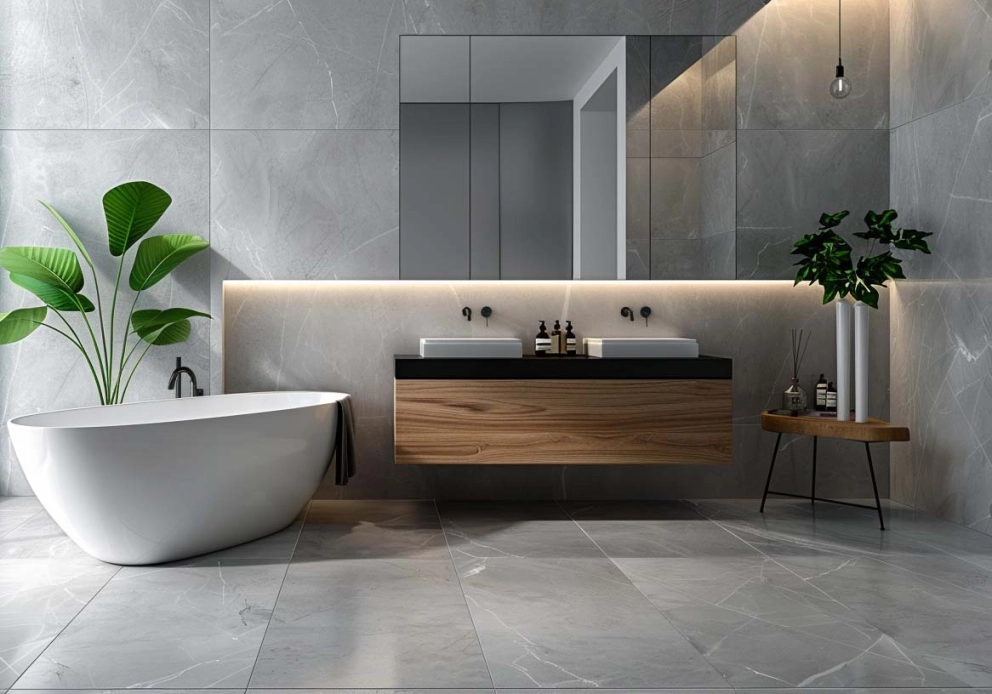
Tiling the entire bathroom
The bold approach of tiling a bathroom floor and walls can bring you ultimate cohesion. This can be a great solution to waterproofing - tiles ensure that every wall and surface is protected. Not to mention that tiled surfaces wipe down quickly to get rid of stains and splashes.
Tiling for both bathroom walls and floor is best suited for:
-
Larger bathrooms
Expansive spaces benefit from floor-to-ceiling tiling, as continuous surfaces create a spa-like bathroom atmosphere. Large-format porcelain or marble slabs are especially striking. -
Small bathrooms
Contrary to intuition, using light-colored or reflective tiling in a small bathroom floor and walls can actually make it feel larger and more open. The large tiles create fewer visual breaks, which reduces clutter and increases perception. -
Style versatility
Tiles for the entire room are available in a variety of styles, from minimalist palettes like stone gray palettes to intricate mosaic tiling bathroom features. Bathroom tiling designs adapt easily to modern, industrial, or classic interiors.
The important consideration for the entire bathroom tiling is how to avoid monotony and make the design work. Try to introduce texture variation, matte tiles mixed with glossy finishes can create an intricate pattern even within the same colour. You can also use contrasting grout or border tiles to enhance depth or add patterned accent strips within the space.
Tile patterns & visual tricks
Modern bathroom tiling designs balance aesthetics with practicality. Here are a few popular patterns and tile colours that you may like to implement. All of these may look stunning if thought through and matched with the rest of the bathroom design.
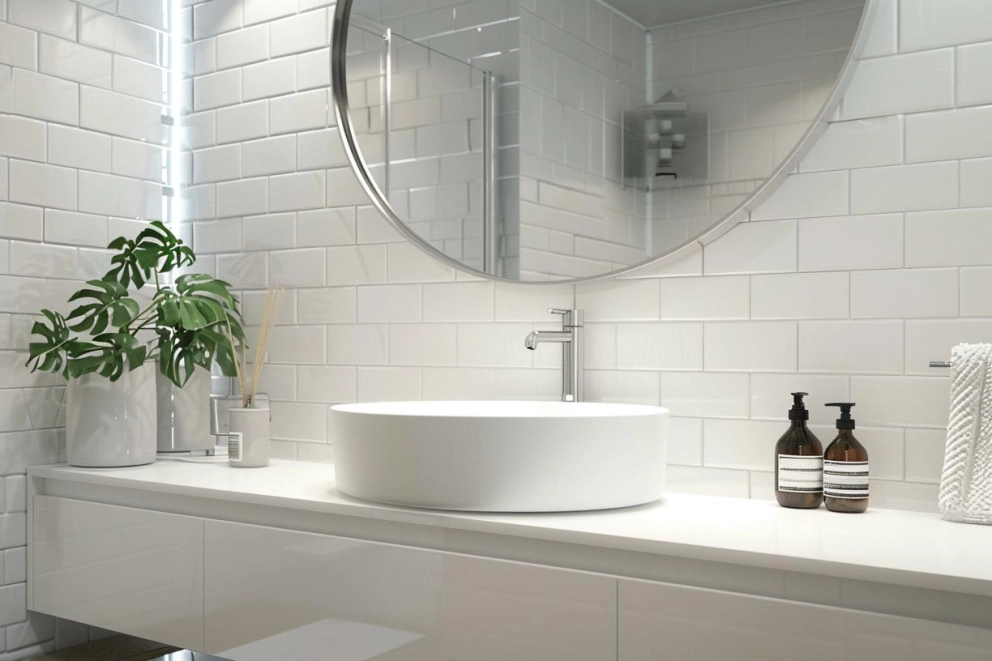
Subway tiling bathroom
Few patterns have the staying power of the classic subway tiling bathroom look. Its clean lines and understated geometry make it adaptable to both modern and traditional interiors.
In a contemporary bathroom, pairing white subway tiles with matte black faucets and sleek, handleless vanity cabinets emphasizes minimalism. In more traditional spaces, bevel-edged subway tiles combined with a shaker-style vanity in soft gray and brushed nickel hardware create a refined, classic feel.
To keep the look from feeling overly sterile, many designers recommend contrasting grout colours - dark grout in modern bathrooms for definition, or soft white grout for a seamless, light-filled finish.
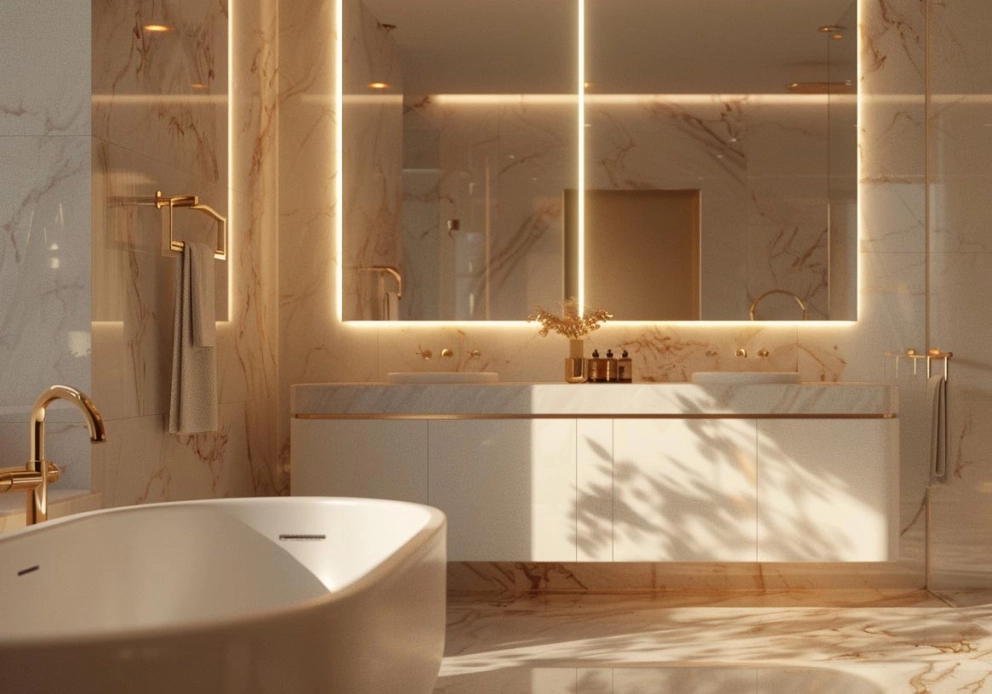
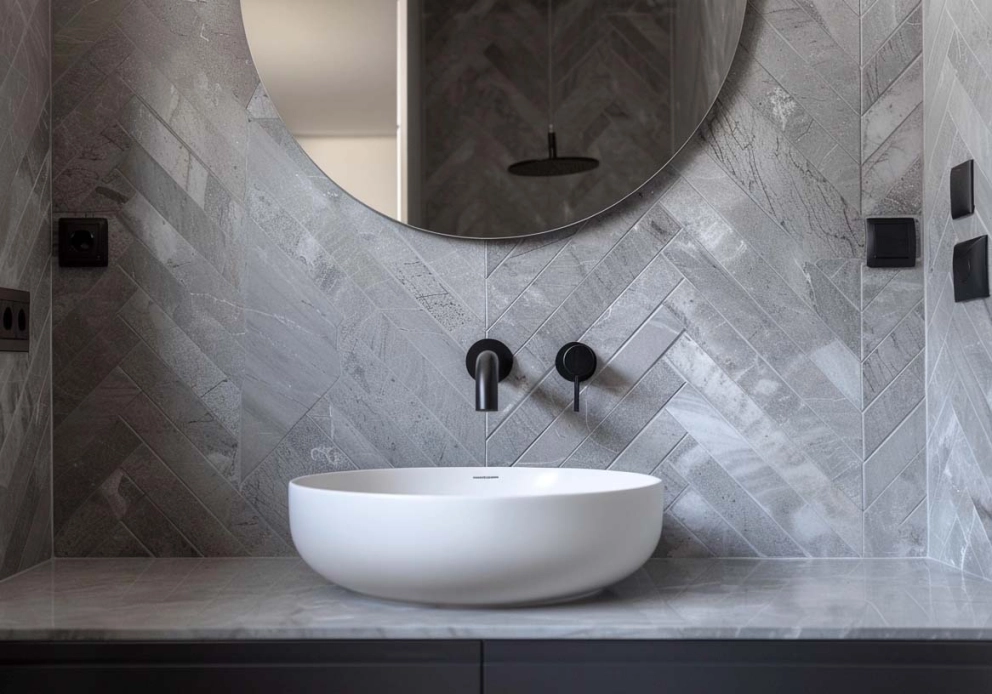
Herringbone patterns
For homeowners seeking modern bathroom tiling ideas with a touch of elegance, the herringbone pattern introduces movement and visual interest.
This layout works especially well in smaller bathrooms, where the diagonal lines create the illusion of depth and length. A marble or stone-look porcelain laid in herringbone adds subtle luxury, best complemented by slim, modern vanities in wood finishes that balance natural warmth against the tile’s geometry.
Hardware in brass or champagne gold softens the strong lines, while wall-mounted sinks with thin profiles enhance the sense of space. Lighting plays a key role here; under-vanity LEDs or a floating vanity design highlight the floor’s pattern and give it a sense of lift.
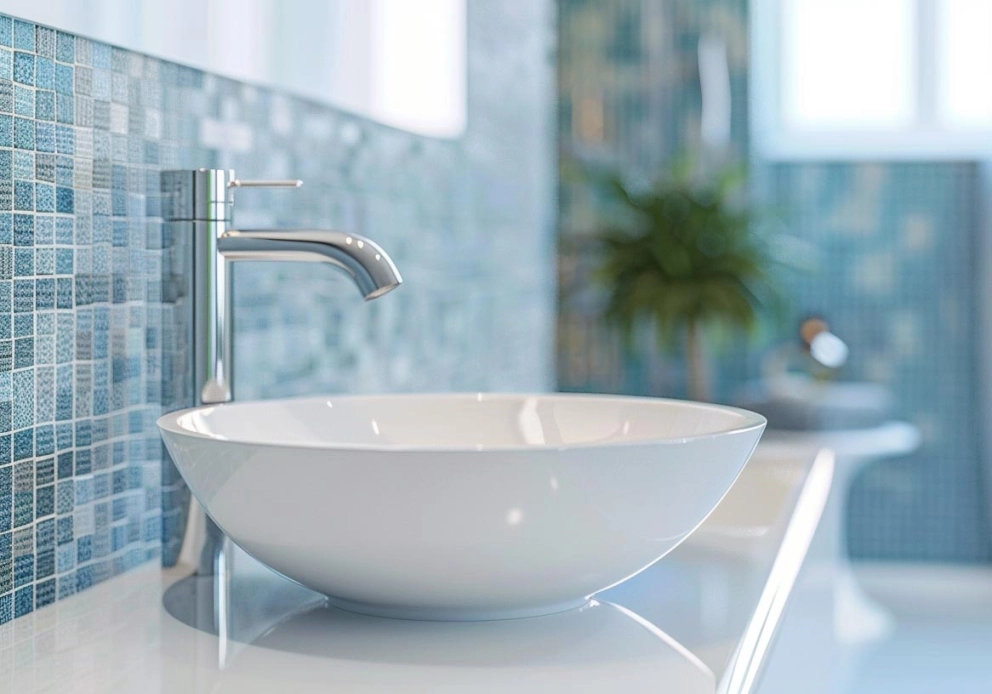
Mosaic tiling bathroom
Because mosaics are intricate, they are often used as accents - inside shower niches, as backsplashes, or to frame a freestanding bathtub.
To keep mosaics from overwhelming their surroundings, pair them with larger, simpler tiles on adjacent walls or floors. Glass mosaics in aquamarine hues pair beautifully with matte white wall tiles and high-gloss lacquer vanity units; stone mosaics with earthy tones pair better with rustic wood vanities, vessel sinks, and oil-rubbed bronze faucets.
Tiling walls in the bathroom with mosaics must be used with caution: let them serve as artwork while leaving other surfaces undisturbed and uncluttered.
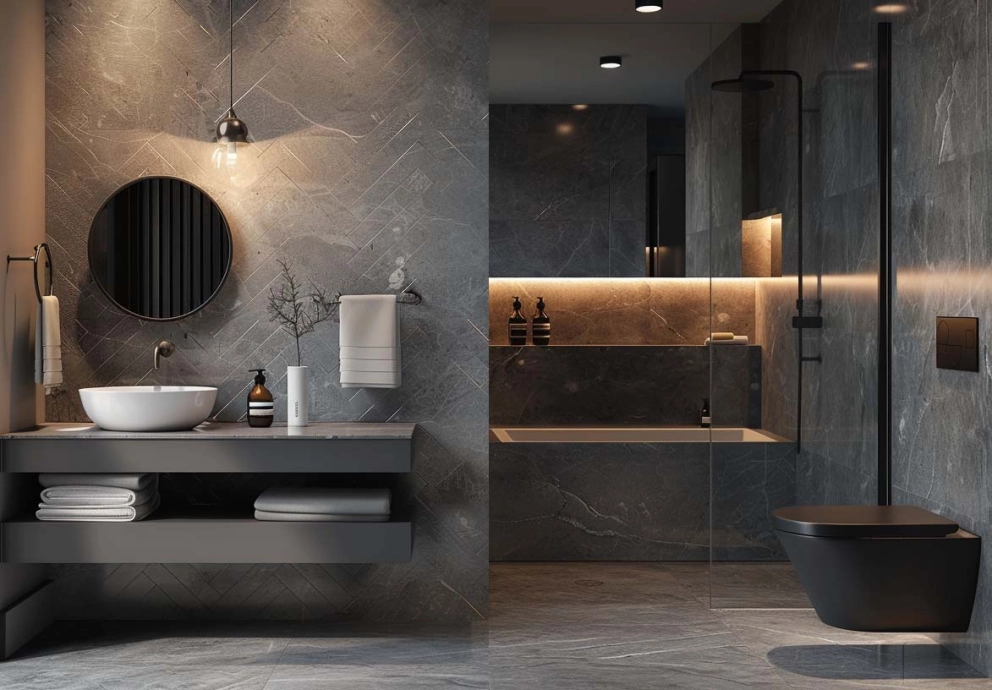
Small bathroom tiling
When working with limited square footage, colours and ideas for tiling a small bathroom must work to create the illusion of spaciousness. Light and glossy colored tiles, in particular, are effective in making small bathrooms appear larger; their light reflectance helps make the space feel larger than its actual dimensions.
To avoid the monotony of all-white bathrooms, though, adding subtle contrast is best achieved through fixtures. Wood vanity tones or brass cabinet pulls can add warmth, while black faucets bring a contemporary edge without overwhelming airy spaces.
Light gray hues combined with sleek chrome faucets and white vanities create a minimal Scandinavian-inspired style, eliminating clutter.
Vertical tiling patterns in small bathroom walls elongate space while large-format tiles reduce grout lines for increased visual flow. Combine this approach with floating vanities, wall-mounted faucets and minimal hardware to free up floor area and keep the space visually open. Adding a frameless mirror above your vanity will further amplify this effect.
Best materials for bathroom tiling
Not all tiles are suitable for every surface. Here is what is important to pay attention to:
|
Surface |
Best materials |
Avoid |
|
Floor tiling bathroom |
Porcelain, ceramic, natural stone |
Wall-only tiles (too thin, slippery) |
|
Wall tiling bathroom |
Ceramic, porcelain, glass, subway tiles |
Heavy stones unless reinforced |
|
Backsplash/vanity wall |
Mosaic, marble, glass |
Large-format heavy stone |
Bathroom tiling cost
The cost for tiling a bathroom should not be an afterthought - it needs to be one of the earliest steps in the renovation process. Ideally, cost considerations should begin as soon as you’ve defined the scope of your project - whether you’re planning to update a bathroom backsplash, retile only the floor, or commit to tiling the whole bathroom surface.
An organized budget provides direction for material choices, sets realistic expectations for labour expenses, and prevents mid-project compromises that may diminish the final design. Consider not only the obvious choices, such as scale of work and quality of material, but also the hidden costs, like preparation, waterproofing and labour.
Material costs
Tile selection can often be the highest expense associated with bathroom remodels.
-
Ceramic $3–$7 per sq. ft.
-
Porcelain $5–$10 per sq. ft.
-
Marble $10–$25 per sq. ft.
-
Mosaics $8–$20 per sq. ft.
Beyond the tiles themselves, be sure to factor in adhesives, grout, and sealants when creating your material budget.
Labour costs
Even the finest tile will fall short without professional installation. Bathroom tiling labour costs vary significantly across cities, depending on demand, availability of skilled contractors, and overall market costs.
|
City |
Average labour cost (per sq. ft.) |
|
Calgary |
$8 – $13 |
|
Toronto |
$9 – $15 |
|
Vancouver |
$10 – $15 |
|
Montreal |
$8 – $12 |
|
Ottawa |
$8 – $13 |
Simple ceramic floor patterns can be installed quickly and inexpensively, while more intricate ones, like herringbone, diagonal, mosaic tiling bathroom designs, or complex colour patterns require more time, precision, cutting, levelling the floor surface and waterproof membrane. Each adds to the labour cost of tiling a bathroom but provides long-term durability.
Extras
Also, keep the following expenses in mind when budgeting:
-
Waterproof bathroom tiling will run you $2–$4 per sq. ft. for membranes.
-
Floor levelling costs around $1–$3 per sq. ft.
-
Removal of old tiles is $3–$5 per sq. ft.
It is strongly advisable to add from 10 to 15% of your budget as a contingency buffer in case unexpected costs of bathroom tiling that can arise during demolition. These are damaged subfloors that result in the cost of tiling a bathroom floor, additional tiles needed or extra labour hours. Planning ahead can ensure your project proceeds smoothly without financial stress.
The scale of the project
Tiling projects of various sizes and scopes vary significantly in cost. Tiling bathroom walls or creating half-wall designs with tiles tends to cost far less than full bathroom floor and walls tiling projects.
So, how much is tiling a bathroom? On average, expect $25-$45 per sq. ft. in both labour and material costs, with higher expenses associated with luxurious finishes for entire bathroom projects.
DIY tiling bathroom
If the overall price for tiling a bathroom outlined above feels overwhelming, consider taking on a do-it-yourself project. Many homeowners opt for this route to save on labour costs, but it’s important to approach it with realistic expectations. DIY tiling a bathroom can be rewarding when you're confident in your skills and patient with precision work; however, any mistakes in waterproofing or uneven tile settings could quickly turn into expensive repairs.
Tools and materials required
Before embarking on any bathroom tiling project, it's necessary to gather the appropriate materials and tools. These typically include:
-
Tiles of your choice;
-
Tile adhesive;
-
Grout (sandless for walls, sanded for floors);
-
Spacers, trowels, and a tile cutter or a wet saw;
-
Levelling system or wedges to prevent lippage;
-
Measuring tape, chalk line, and spirit level;
-
Waterproofing membrane or backer board;
-
Safety gear - gloves, goggles, and knee pads;
Once equipped, you can follow structured bathroom tiling steps that professionals use.
Tiling bathroom project steps
Step 1: How to prepare the bathroom for tiling:
-
Remove fixtures, baseboards, and old flooring/wall finishes.
-
Inspect subfloor and drywall - replace damaged areas.
-
Learn the rules for tiling a bathroom: walls must be clean, dry, and level.
-
Avoid tiling over bathroom wall tiles - this traps moisture and creates uneven surfaces.
Step 2: Waterproofing before tiling the bathroom:
-
Apply waterproof membranes to shower areas and bathroom floors.
-
Seal around windows and niches (tiling bathroom window, tiling around bathroom shower window).
-
Consider epoxy grout for waterproof bathroom tiling.
Step 3: Measuring & planning:
-
To measure for tiling a bathroom, measure square footage, add 10% for cuts and waste.
-
Plan layout: dry-lay tiles to test patterns.
-
Decide where to start -floor tiling typically begins in the center; wall tiling begins at the midpoint.
Step 4: Installing tiles:
-
Use thin-set mortar suitable for bathroom environments.
-
For tiling a bathroom wall, start with a ledger board to keep the first row level.
-
For tiling the bathroom floor around the toilet, cut tiles with a wet saw for a precise fit.
Step 5: Grouting & finishing
-
Wait 24 hours before grouting.
-
Apply grout diagonally across joints.
-
Seal grout, especially for stone tiles.
Step 6: Post-installation waterproofing
-
To waterproof the bathroom floor after tiling, apply a penetrating sealer.
-
Check for gaps around toilets, vanities, and windows.
DIY vs. professional installation
DIY bathroom tiling can often be cheaper up-front since you save on labour, but time may be an issue without experience and its associated learning curve.
Professional services will increase the total bathroom tiling cost, but bring speed and precision. A contractor can finish an entire project more quickly while producing consistent levels and polished results.
Quality is another key difference between DIY projects and professional services: DIY efforts may result in uneven grout lines or small gaps; on the other hand, professionals ensure smooth finishes that enhance any room in which they're placed.