How to protect kitchen cabinets with varnish? Choose the best top coat for cabinets
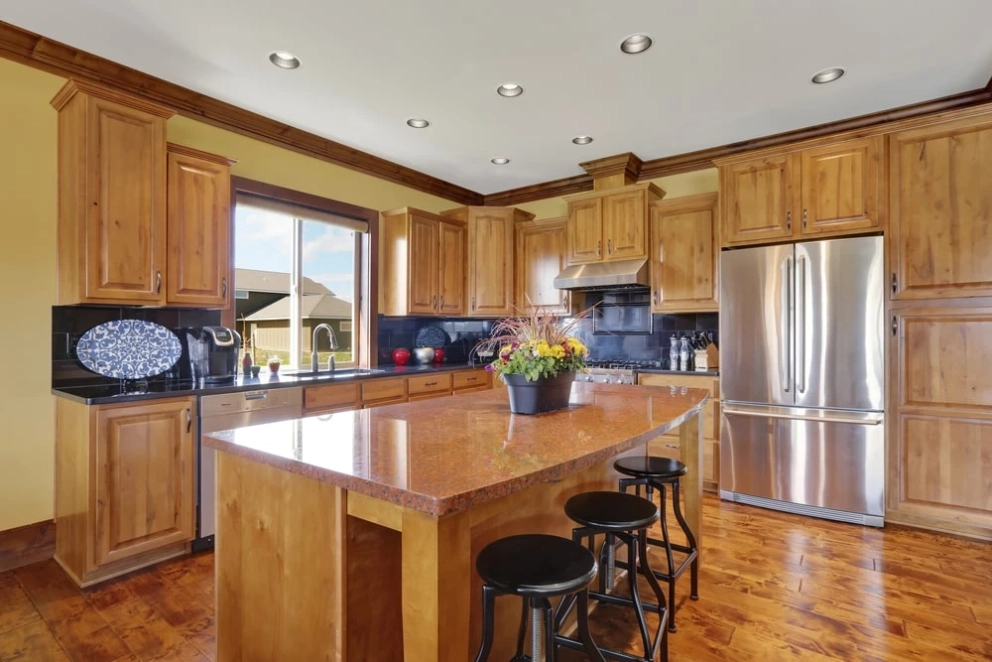
There are many styles of kitchen cupboards, made of wood, veneer, and synthetic materials, which can be found on the market today. You’ve done a great job choosing among the variety of kitchen materials and styles and now your kitchen looks exactly how you want it. And you probably wish your cupboards to remain so beautiful for as long as possible. Cabinet varnishes are the final touch to your facades that may help with the task.
It is important to protect your kitchen cabinets against scratches, splatters, wear and other damage. Although applying a cabinet sealant is a non-required job, not doing so will negatively affect your units over time. The topcoat of a kitchen cabinet is specially formulated to prolong the longevity of units.
In order to keep their beauty for years to come, it is necessary to choose the right cabinet varnish as there is not one type of varnishing that works best on every cabinet. You will need to consider a number of factors including moisture level, exposure to airborne pollutants, like grease and UV rays, as well as drying time. The type and quality of varnish will also vary depending on the cabinet material, and its finish. In this blog, Cut2Size selected a few best topcoats for kitchens and will guide you through the necessity of varnishing your cabinets and choosing the best product for your needs.
Types of sealant for cabinets
When it comes to preserving the beauty and longevity of your kitchen cabinets, choosing the right kitchen cabinet sealant is paramount. Whether you're sealing painted cabinets, giving old kitchen cabinets a fresh look, or ensuring the durability of pressed wood, particle board, or plywood cabinets, understanding the various types of sealants available is essential. In this blog, we'll explore four popular sealers for kitchen cabinets: polyurethane, wax, varnish, and lacquer, and discuss how each can provide either the gloss or matte finish for sealing cabinets and the level of protection you need.
- Polyurethane for kitchen cabinets
Polyurethane is a versatile and robust kitchen cabinet sealant. It's known for its durability and resistance to moisture, making it an excellent choice for painted cabinets. Finishing cabinets with polyurethane involves thorough surface preparation, with cleaning and sanding, followed by the selection of either oil-based or water-based polyurethane, depending on your cabinet's material and finish preferences.
To achieve a matte finish when painting polyurethane cabinets, opt for water-based polyurethane with a single, thin coat. For a subtle sheen, apply 2-3 coats of water-based polyurethane, sanding between coats for a satin finish. If a high-gloss look is your aim, choose oil-based polyurethane and apply 3-4 coats, sanding between each for a shiny finish that enhances aesthetics but may require more maintenance. Polyurethane for painted cabinets offers both protection and the desired aesthetic outcome for your kitchen cabinets, making them look stunning for years to come.
- Wax for sealing cabinets
Wax is a traditional yet effective sealer for kitchen cabinets. When waxing polyurethane kitchen cabinets, you create a layer that not only enhances the cabinet's appearance but also provides an extra shield against minor scratches and stains. However, it's important to note that wax may require more frequent reapplication compared to other sealants, making it ideal for those who don't mind a bit of maintenance. Waxing polyurethane kitchen cabinets can achieve a subtle sheen that complements various kitchen styles, from rustic to modern.
- Acrylic varnish for cabinet sealing
Acrylic topcoat is a classic choice that offers excellent durability and clarity, drying quickly with low odour, making it suitable for indoor use in kitchens. Waterborne acrylic varnish is a high-floss coating that offers outstanding resistance against yellowing over time and is easily cleaned off using water alone.
- Lacquer for cabinet protection
Lacquer is a fast-drying and highly durable cabinet sealant used in sealing old kitchen cabinets. It provides a sleek and glossy finish that can transform your kitchen cabinets into modern marvels. When sealing seams on plywood cabinets or giving new life to old kitchen cabinets, lacquer offers a smooth and even surface that's easy to clean. It's worth noting that lacquer is best applied by professionals due to its fumes and flammability, ensuring a pristine finish that lasts.
The choice of sealant for cabinets depends on your preferences, cabinet material, and desired aesthetic. Polyurethane, wax, varnish, and lacquer each offer unique advantages for sealing seams on wood, plywood or particle board cabinets, be they painted, stained or required refinishing. Whether you're aiming for a matte finish for sealing cabinets or a glossy transformation, understanding the characteristics of these sealants will help you make an informed decision and keep your kitchen cabinets looking their best for years to come.
How to seal kitchen cabinets?
To ensure that your cabinets remain as beautiful and durable as the day they were installed, sealing kitchen cabinets is necessary. In this section, we'll provide you with a comprehensive, step-by-step guide on how to seal kitchen cabinets effectively. This guide will equip you with the knowledge and confidence needed to preserve the heart of your home.
| Step | Task | Description |
| 1 | Prepare your cabinets | Remove any dust, grease, or previous finishes. Sand lightly for a smooth surface. |
| 2 | Choose the type of polyurethane | Select either oil-based or water-based polyurethane based on cabinet material and desired finish. |
| 3 | Gather your supplies | Assemble necessary materials: brush, stir stick, lint-free cloth, sandpaper, and polyurethane sealant. |
| 4 | Stir thoroughly | Gently but thoroughly stir the polyurethane for an even application. |
| 5 | Start with a thin coat | Apply a thin, even coat of polyurethane, following the wood grain direction to prevent brush marks. |
| 6 | Sand between coats | Once the first coat dries (usually within a few hours), lightly sand the surface with fine-grit sandpaper. |
| 7 | Repeat the process | Apply 2-3 additional coats, sanding between each, as needed for your cabinets. |
| 8 | Drying time | Allow each coat to dry according to the manufacturer's instructions. Water-based polyurethane typically dries faster. |
| 9 | Finish with a top coat | For added protection and a smoother finish, consider applying a clear top coat of polyurethane over the final coat. |
| 10 | Final inspection & cleanup | Inspect the cabinets for evenness and cleanliness. Make any necessary touch-ups, and clean your tools promptly. |

While the exterior of your kitchen cabinets may get most of the attention, sealing and varnishing the interior, edges, and undersides are equally essential. Now, let’s explore how to seal and varnish kitchen cabinets from every angle, inside and out, to keep them not only beautiful but also protected for years to come.
- Sealing the side of cabinets
Sealing under kitchen cabinets and sideboards, ensure they are clean and dry. When doing kitchen cabinet side sealing, apply clear polyurethane or varnish to protect against moisture, dust, and minor dings. This step helps maintain the wood's appearance and adds longevity to your cabinets' life.
- Sealing under kitchen cabinets
The undersides of kitchen cabinets are prone to dust and dirt buildup. Cleaning them thoroughly before applying a sealant is crucial. Use a water-based or oil-based polyurethane to shield the undersides from moisture, making it easier to clean and maintain.
- Sealing edges of cabinets
The edges of cabinets often endure the most wear and tear. To reinforce them, apply a clear sealant to prevent chipping, peeling, or discoloration over time. This step is particularly essential for cabinets near high-traffic areas.
- Sealing inside of cabinets
Sealing inside kitchen cabinets is vital to protect against moisture and spills, ensuring their longevity. Use a clear polyurethane or varnish to create a protective barrier, making the cabinet interiors more resistant to stains and easier to clean.
- Varnishing inside new wood kitchen cabinets
For newly installed unfinished wood kitchen cabinets, it's advisable to varnish the interior and exterior to safeguard the wood. Sand the surfaces lightly, then apply a clear varnish. Sand between coats for a smooth finish, and allow ample drying time for each application.
- Sealing bottom cabinets in kitchens
Bottom cabinets are exposed to spills and potential water damage. Seal the bottom edges with a clear sealant and cover interiors with cabinet liner to prevent moisture infiltration. This extra protection helps maintain the integrity of your cabinets over time.
- Varnishing kitchen cabinet doors inside
The inside of cabinet doors can also benefit from varnishing. Ensure the doors are clean and dry, then apply varnish to protect against moisture, stains, and wear. This step enhances the overall durability of your cabinets.
Sealing and varnishing kitchen cabinets inside and out is a proactive measure to extend their lifespan and maintain their beauty. These steps are particularly crucial for wood cabinets and those located in high-moisture or high-traffic areas. By taking the time to properly seal and varnish your cabinets, you'll not only enhance their appearance but also make them more resilient to the rigours of daily kitchen use.
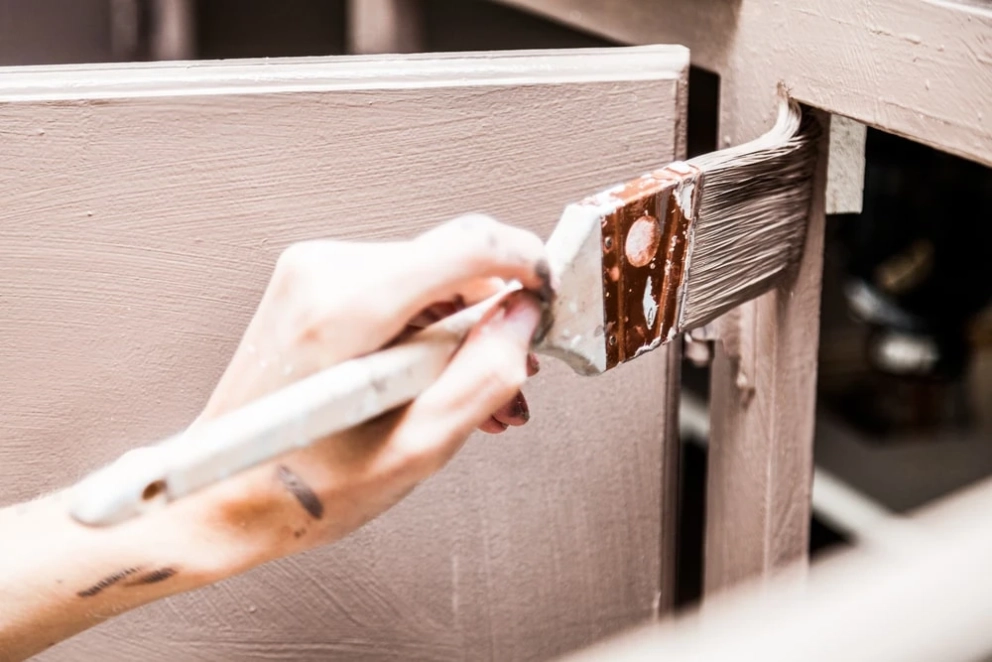
Sealing newly painted cabinets
Repainting cabinets and sealing add an extra layer of protection to the paint or stain. This helps to shield them from scratches and preserve their original colour, and everyday wear and tear. Sealing cabinets after painting can significantly extend the lifespan of your cabinets, ensuring they look great for years to come.
We’ll delve into the nuances of sealing painted kitchen cabinets with different types of paint finishes and materials, including white-painted cabinets that are prone to yellowing, oak cabinets, chalk-painted cabinets, enamel-painted cabinets, painted and stained wood cabinets, and refinished kitchen cabinets.
- Sealing white painted cabinets to prevent yellowing
White-painted cabinets can lend a fresh and timeless look to your kitchen. However, they are susceptible to yellowing over time due to exposure to light and environmental factors. To combat this issue, choose a clear water-based polyurethane cabinet seal which provides protection while maintaining the cabinet's pristine white appearance. Apply thin coats and sand between each for a smooth finish.
- Sealing white oak cabinets to enhance natural beauty
Oak cabinets possess a unique grain pattern and natural beauty. To seal oak cabinets effectively, consider an oil-based polyurethane or varnish to enhance the wood's warm tones. Apply multiple coats of sealant for kitchen cabinets to achieve the desired sheen level and provide durability that stands up to daily kitchen use.
- Chalk-painted kitchen cabinets sealing
Chalk paint is a trendy choice for achieving a vintage or rustic look. While it doesn't typically require a topcoat, painting cabinets and sealing it can provide extra protection.
After applying chalk paint to your cabinets, sealing becomes a good option for maintaining that rustic charm. Consider sealing chalk-painted kitchen cabinets with either clear wax or polyurethane for added protection. Sealing kitchen cabinets after chalk paint not only prolongs the life of your paint job but also simplifies cleaning and upkeep. To achieve the best results, ensure your cabinets are thoroughly cleaned and dry before sealing, and always follow the manufacturer's instructions for your chosen sealant. This practical approach will help keep your kitchen cabinets looking stylish and well-maintained for the long haul.
- Sealing kitchen cabinets after painting with enamel
Enamel paint offers a smooth and durable finish, perfect for kitchen cabinets. Sealing enamel-painted cabinets with clear water-based polyurethane is advisable for making them gloss more than for added protection. Follow the same application steps as with painted cabinets to achieve a lasting result.
- Sealing painted wood cabinets for longevity
Sealing kitchen cabinets after painting, especially when they are made of wood can highlight the grain while offering protection. Varnish is an excellent kitchen cabinet clear coat for painted wood cabinets, as it enhances the natural appearance of the wood while providing durability and resistance to moisture.
- Sealing stained kitchen cabinets for richness
Stained kitchen cabinets offer depth and richness in colour. To seal stained cabinets effectively, choose a clear varnish or polyurethane that matches the desired finish. Apply multiple coats, sanding in between, to achieve a glossy or satin sheen that complements the stain.
Overall, sealing your refinished cabinets is the final step to preserve your hard work. The choice of sealant depends on the finish you've achieved. Follow the recommendations above based on your cabinet's material and the type of paint or stain used in the refinishing process.
Sealing unfinished cabinets
Sealing wood cabinets is a crucial step in ensuring their durability and longevity. Unfinished cabinets, typically made of raw wood, are vulnerable to moisture, stains, and wear and tear. Sealing wood cabinets after staining not only protects the wood from these elements but also enhances its natural beauty by highlighting the grain and colour.
Whether you choose a clear polyurethane for a glossy finish or an oil-based sealer for a matte look when sealing maple cabinets or sealing unfinished oak cabinets, the sealant provides a protective barrier that prevents moisture penetration and guards against stains. Sealing unfinished oak cabinets not only preserves their aesthetics but also adds years to their lifespan, making it a worthwhile investment in the overall quality and appearance of your kitchen or living space.
Varnishing kitchen cabinets
Varnishing kitchen cabinets that are unfinished is a popular finishing technique that offers both protection and aesthetic enhancement. When you apply a kitchen cabinet varnish, you create a transparent or lightly tinted protective layer that not only shields the wood from moisture, stains, and scratches but also accentuates the natural beauty of the wood grain.
To varnish kitchen cabinets, start by ensuring the surfaces are clean and dry. Sand the cabinets lightly to create a smooth surface for the varnish to adhere to. Apply a clear varnish using a brush, following the wood grain, and allow it to dry thoroughly between coats. Sand lightly between coats to achieve a smooth finish, and repeat this process until you achieve the desired level of sheen and protection for your cabinets.
Varnish for kitchen cabinets comes in various finishes, including gloss, satin, and semi-gloss, allowing you to tailor the look of your cabinets to your desired style. Whether you have wood cabinets that you want to showcase or painted cabinets that need extra durability, varnishing is a versatile choice. Varnished kitchen cabinets provide a smooth and easy-to-clean surface, making it an excellent option for kitchen cabinets that endure daily use and exposure to various elements.
Waxing kitchen cabinets

Wax for kitchen cabinets has been a time-tested method for protecting and enhancing their appearance. However, like any finishing technique, a cabinet wax finish comes with its own set of pros and cons, and whether or not it's recommended depends on various factors.
Consider cabinet waxing as an option in the following cases:
- For a rustic or antique look
If you desire a rustic or antique appearance for your cabinets, a kitchen cabinet wax can add character and depth. It imparts a soft sheen and can darken the wood slightly, giving it that cherished time-worn feel.
- Low traffic areas
Wax for cabinets is suitable for cabinets in low-traffic areas of your home, such as a china cabinet or a display cabinet. In these spaces, the protective qualities of wax can be sufficient.
When it’s best to go with other varnishing methods:
- High-traffic areas: In a busy kitchen, where cabinets are exposed to spills, heat, and daily use, wax for painted kitchen cabinets may not offer adequate protection. Cabinets in these areas benefit more from a durable sealant like polyurethane or varnish.
- Painted cabinets: If you've painted your cabinets and want to preserve the paint colour and finish, wax for painted cabinets may not be the best choice. Painted cabinets often benefit from a clear topcoat, like polyurethane, to prevent chipping and staining.
Practical tips for waxing cabinets
In this section, we'll share five insights to help you apply waxing to your cabinets:
- Proper preparation
Ensure the cabinets are clean, dry, and free from dust and grease before applying wax.
- Use high-quality wax
Invest in a high-quality furniture wax specifically designed for cabinets. Avoid using automotive or floor wax, as they may contain harmful chemicals.
- Application
Apply a thin, even layer of wax using a soft, lint-free cloth or a waxing brush. Always follow the grain of the wood. Less is often more with wax, so don't overapply.
- Buffing
Allow the wax to dry for the recommended time, usually 15-20 minutes, and then buff it with a clean, dry cloth to achieve the desired sheen.
- Regular maintenance
Keep in mind that waxed cabinets may require periodic reapplication to maintain their protection and appearance, especially in high-traffic areas.
Homemade waxing for kitchen cabinets
Creating your homemade wax for kitchen cabinets is surprisingly simple. You'll need beeswax and a carrier oil like mineral oil. Melt the beeswax and mix it with the carrier oil until you achieve a creamy consistency. Apply this DIY wax with a cloth or brush, then buff it to a beautiful sheen. Homemade wax not only rejuvenates wooden cabinets but also provides a protective layer that repels moisture and stains.
Lime wax for kitchen cabinets is a mixture of mineral wax and chalk, is an excellent choice for those seeking a unique and slightly distressed look for their cabinets. It adds depth and character to your kitchen cabinets, highlighting the wood's natural grain. To apply lime wax, first sand your cabinets lightly, then rub the wax in circular motions. Wipe off the excess and watch your cabinets transform into pieces of rustic elegance.
- Waxing laminate wood veneer kitchen cabinets
Laminate wood veneer cabinets can be challenging to refinish, but waxing laminate wood kitchen cabinets can still work wonders. Start by cleaning the cabinets thoroughly. Then, apply a thin layer of wax and buff it to a shine. While waxing laminate wood kitchen cabinets may not provide the same depth as with solid wood, it can refresh their appearance and add a subtle sheen.
- Waxing old plywood kitchen cabinets
Old plywood kitchen cabinets can regain their youthful appeal with waxing. Ensure they're clean and dry, then apply a clear wax to the surface. This will not only rejuvenate the wood but also protect it from moisture and wear.
- Waxing wooden kitchen cabinets
Waxing kitchen cabinets, including elegant cherry wood, can benefit significantly from waxing. Apply wax evenly with a cloth or brush, working in the direction of the grain. Buff the cabinets to a beautiful shine, enhancing their natural beauty while providing protection.
Homemade waxing and lime wax are excellent DIY methods to refresh your kitchen cabinets, from laminate wood veneer to plywood and wooden cabinets. These techniques offer not only aesthetic improvements but also add a protective layer to extend the life and beauty of your cabinets. Give your kitchen a budget-friendly makeover with these creative waxing solutions.